Introduction
The purpose of this application is to import into Business Central an Excel file with the employees’ payroll information and generate the ledger entries. In addition, all the information will be saved in a historical table of payroll movements to be able to analyze the amounts paid and group them by date, department…
Payroll is a very sensitive issue because of the amount of personal information it contains. That is why the application is designed to import, not only the file with the payroll as such, but also a file with the list of employee codes. The agency can send the payroll file with the amounts paid according to the different concepts with an internal code used in its application and at the same time import a file of correspondence between the employee codes used in the agency program and those used in Business Central.
In this way, when loading the payroll file, the employee’s data will be accessed in Business Central that are necessary at the information level (dimensions, department…) and sensitive employee information will never be stored or traveled in the payroll file.
Both the payroll file and the employee code relationship file will be Excel files.
If the user who is going to work with this development is configured with the “Business Manager” role, they will have all the menu options accessible from the main screen of their role,
either from the menu:
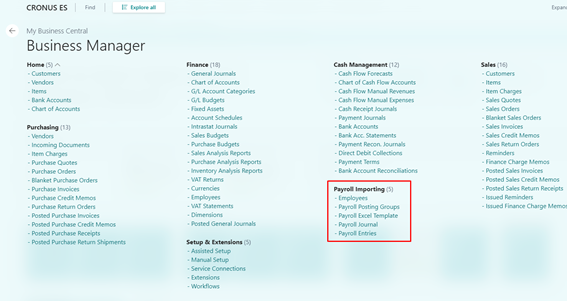
Setting up the application
Before start working with the application user must make a series of configurations:
- Create import templates: At this point the user must define the format of the payroll import Excel file, indicating where each payroll concept will come from.
- Payroll posting groups: At this point the user must define each of the ledger accounts to which each of the payroll concepts will be posted.
- Employee set up: Employees will need to report the ID and posting group. Each employee can have a different posting group and thus assign the payroll concepts to different ledger accounts based on, for example, the employee’s department.
To set up employees, you will need to access the employees’ card and complete the indicated data. The configuration of templates and payroll posting groups can be done from the card of each or from the assisted setup. Here is how to make each of the configurations.
a. Set up payroll posting groups
To set up payroll posting groups we have two options:
- From assisted setup: to do this you will have to follow the following steps
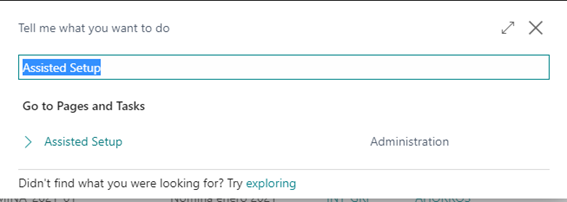
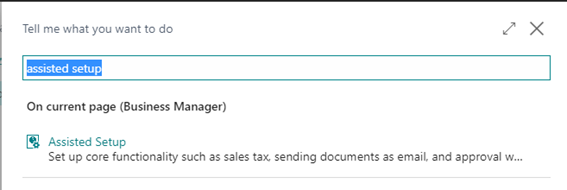
In “Tell me what you want to do” search for “Assisted Setup”
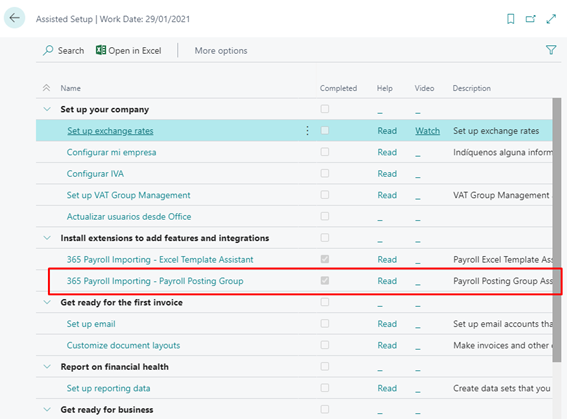
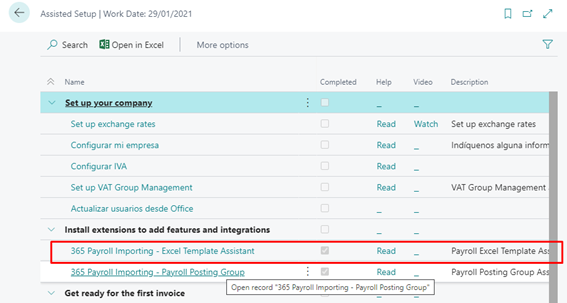
In the list shown select “365 Payroll Importing – Payroll Posting Groups”.
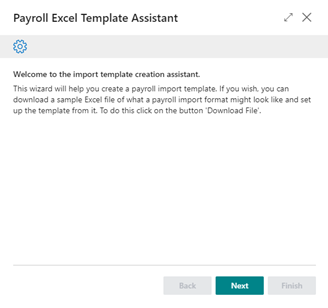
Initially a screen is displayed informing what to do in this wizard. Press “Next” to continue.

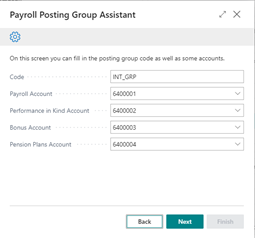
The following screen requests that you enter the payroll posting group code, as well as payroll, performance in kind, bonuses, and pension plans accounts.
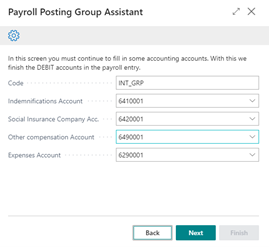
Selecting the “Next” option we move to another configuration screen, in which again a series of accounts will be requested, in this case the indemnifications account, the Social Insurance Company, the other compensations account and the expenses account.
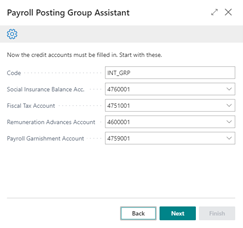
By selecting the “Next” option we move to another setup screen, where several accounts will be requested again, in this case we will have to indicate the Social Insurance balance account, the fiscal Tax account, the remuneration advances account and the payroll garnishment account.
By pressing “Next” we get to the last configuration screen. It will have to report the last three accounts, two for company services and for outstanding payment.
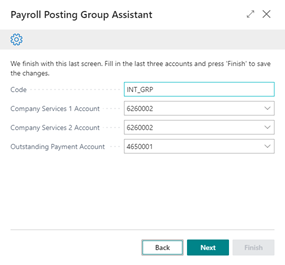
By pressing “Next” we reach a screen that tells us that the wizard has finished. Pressing the “Finish” button on that screen will save the payroll accounting group we just created to the database.

At any time of the configuration, we can go back to the previous screens by pressing the “Back” option.
Once the configuration of our registration posting group in the “Assisted Setup” is completed it will be marked as completed.
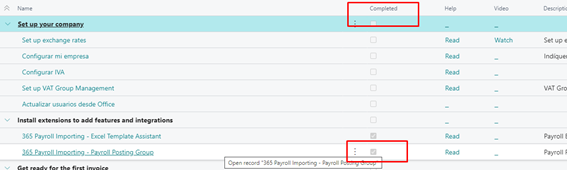
This simply means that a configuration has already been made, but it does not mean that a new group can be created from this option. We will simply be informed that the assisted setup has already been run but selecting “Yes” will return to the first screen of the assisted setup.

- From the payroll posting groups tab itself: The other way to create a payroll posting group is from the payroll group list itself.
This option can be accessed directly from the user’s role menu (if defined with a “Business Manager” role) or from the “Tell me what you want to do” option by searching for “Payroll posting groups”.
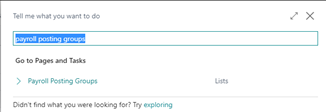

From both options the user will access the list of payrolls posting groups and by clicking on the menu option “New” you will access a tab where you can set up all the ledger accounts where the different sections of the payroll will be allocated.


Before you begin setting up payroll posting groups, the user must define in the chart of accounts all the accounts that he or she will need. If you do not have any of them defined, you can do so at the time you are creating the payroll posting group, both from the assisted setup and from the posting group card itself. To do this, when deploying to the account selection you will select the “New” option that will take you to a screen to create a new account.

b. Setting up payroll import templates
The next point in the initial configuration of the application is to configure the payroll import templates. In this configuration the user must indicate on which line the payroll data begins (some rows within the Excel file may be explanatory or header) and in which column the employee identification is reported, as well as the different concepts of payroll.
As in the previous case we have two options:
- From assisted setup: to do this you will have to follow the following steps
Under “Tell me what you want to do” look for “Assisted Setup”
In the list that is displayed select “365 Payroll Importing – Excel Template Assistant”.
Initially a screen is displayed informing you what to do in this wizard. Press “Next” to continue.
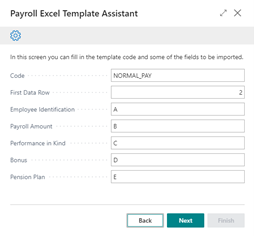
On the next screen you will have to report the template code, the first row of the file where payroll data will go and the columns where the employee ID, payroll amount, performance in kind, bonus and pension plans are reported. Columns must be indicated with the corresponding letter in the Excel file. Pressing “Next” accesses the next configuration window.
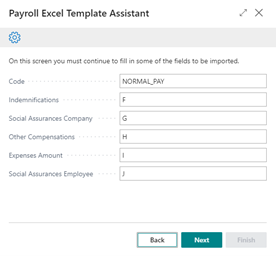
Selecting the “Next” option accesses the following configuration screen, where you will have to indicate the columns where the amounts of the indemnifications are reported, Social Assurances in charge of the company, other compensations, expenses, and social assurances in charge of the employee.
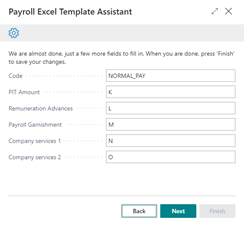
By pressing “Next” you reach the last screen of the configuration where you would only have to report the columns where PIT amounts, remuneration advances, payroll garnishment and company services come from.
Finally, by pressing “Next” you reach the screen that tells us that we are done with the configuration. Pressing “Finish” will save the data that we have indicated.
At any time of the configuration, we can go back to the previous screens by pressing the “Back” option.
Once the import template configuration is complete in the “Assisted Setup” it will be marked as completed.
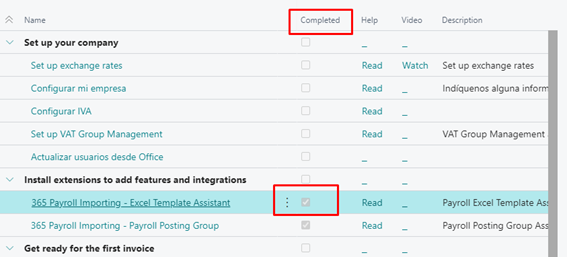
This simply means that a configuration has already been made, but it does not mean that a new import template can be created from this option. We will simply be informed that the assisted setup has already been run but selecting “Yes” will return to the first screen of the configuration.

- From the payroll import template list itself: The other way to create a payroll import template is from the template list itself.
This option can be accessed directly from the user’s role menu (if defined with a “Business Manager” role) or from the “Tell me what you want to do” option by searching for “Excel Payroll Templates”.
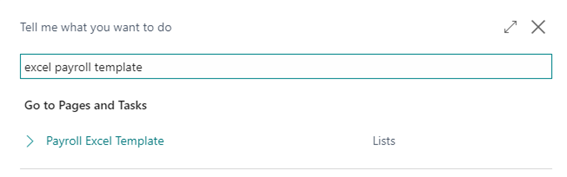

From either option the user will access the list of import templates and by clicking on the “New” option will be published and you can create a new template indicating the code of this, the first row of data and the columns where you will be informed in the Excel file of the amounts of each of the concepts.

An example of a payroll import file based on the template that was set up in the previous example would be:

c. Employee set up
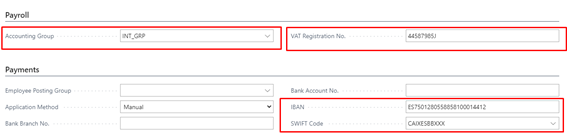
The last step in setting up before you start working with payroll import is to set up employees. For each employee, the payroll accounting group must be reported, its identification (NIF, CIF…) and, if the SEPA file is to be issued from Business Central for the bank to make the payment of payroll, the IBAN and the SWIFT.
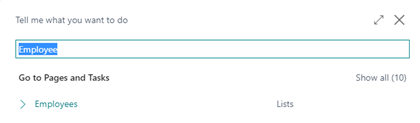
To do this, we will access the list of employees directly from the user’s role menu (if defined with a “Business Manager” role) or from the “Tell me what you want to do” option by searching for “Employees”.

In the list shown we will select the employee to modify and by means of the “Edit” option we will access the card.
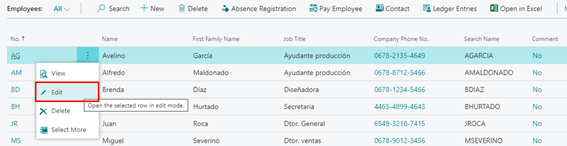
In the employee’s card we will inform the payroll accounting group, identification, IBAN and SWIFT.
Payrolls import and posting
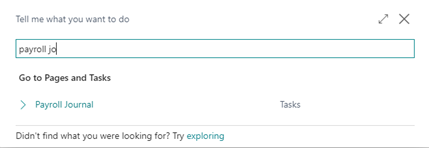
The import of the payroll file as well as its postgin will be executed from the “Payroll Journal” menu option. To access this option, we can do so from the main screen of the user’s role (if defined with a “Business Manager” role) or from the “Tell me what you want to do” option by searching for “Payroll Journal”.

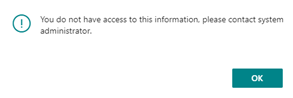
When you first select this option, you will see an error message indicating that the user does not have access to this information. Because payroll information is sensitive information, in addition to having the necessary permissions set up in BC, the user who will process the payroll needs to have an additional check marked in the user settings.
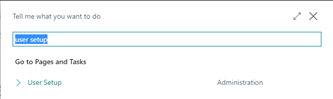
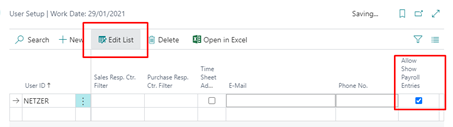
To give the user permissions we must access the user setup screen and check the permission “Allows Show Payroll Entries.” To do this, in the option “Tell me what you want to do” we search for “User Setup”.
In the users list (if the user is not in this list, it will have to be registered using the “New” option) select the user we want to give permission and selecting “Edit list” mark the check.
Once this is done, the payroll journal can be accessed.
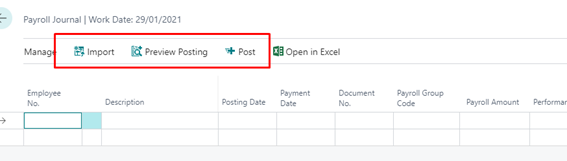
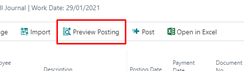
On the payroll journal screen you can see three options: “Import”, “Preview Posting” and “Post”. Let us check them.
a. “Import“ option
This is the option that will allow us to import employee payroll files. Selecting it will show us a screen where we must indicate certain data
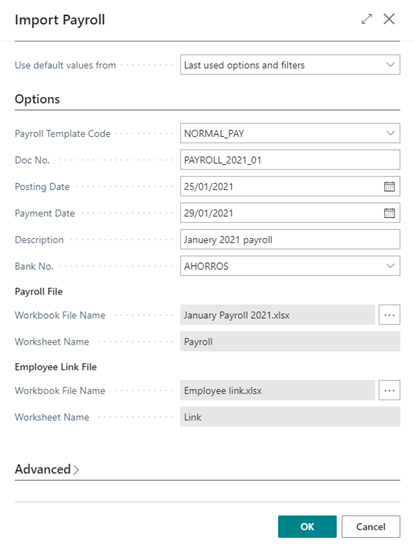
- Payroll template code: indicates the template (that is, the format of the Excel file) to be used for import. As already explained, we can configure as many import templates as we want, depending on the different payroll formats that we may have in the company.
- Doc No.: is the document number with which the post is to be made.
- Posting Date: date on which the post will be made.
- Payment Date: is the payroll payment date. This date will be used when the user issues the SEPA file for the bank to pay the employee.
- Description: description of the posting.
- Bank No.: The bank by which different payments will be made to employees.
- Payroll File: In this section you must select the Excel file and the sheet inside it where the payroll information is. To do this you have to follow the steps below:
Click on the dots to the right of the field
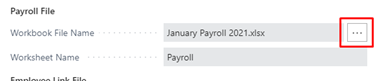
Select “Choose” on the next screen to display the file selection screen
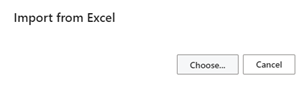
Select the corresponding file and “Open”.

If the Excel file has only one sheet it will be reported directly in the “Worksheet Name” field. If you have more than one, after selecting the file a window will be displayed to select the sheet where the payroll information is.
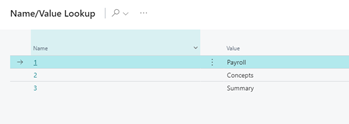
Selecting the sheet will fill in the field “Worksheet Name”.
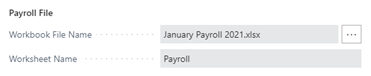
An example of a payroll Excel file might look like the following:

- Employee link file: As previously discussed, payroll information is sensitive information. In order not to enter personal information in the payroll file, you can upload an additional file that relates the employee ID in the management program to the employee ID in BC. In this way only the person who does the payroll import into BC will have all the information. To select this file, you will have to proceed in the same way as with the payroll file, first selecting the Excel employee relationship file and the sheet within the file if necessary.
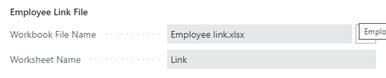
The employee relationship file will simply indicate the employee code in the management program and the employee ID in BC (this identifier is not the registration code in BC, it will be the VAT number, CIF…). An example of an employee relationship Excel file would be as follows:

If the employee identifications are directly reported in the payroll file, it is not necessary to select this second file.
Once all the data has been reported and the files have been selected, we can select the “OK” option to have the files read and the records uploaded to the payroll journal.
The payroll journal displays the user ID, description, posting and payment date, document number, and amounts for each of the concepts. It also shows the payroll posting group that will indicate the general ledger accounts where each concept will be posted.

b. “Preview posting” option
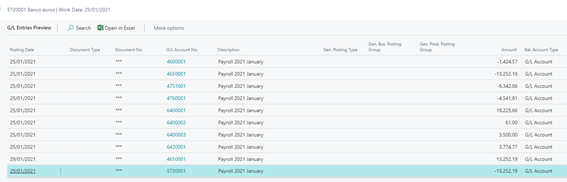
Once the payroll lines are loaded, and before posting them, we can see what the ledger entry would look like using the “Preview posting” option. This option works the same as in BC general journals, showing a window with a simulation of what the posting would look like.

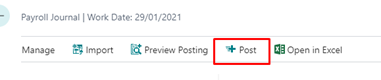
c. “Post” option
Once the payroll journal has been reviewed, we will proceed to register it. To do this we select the option “Post”.
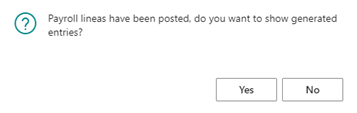
The payroll ledger entry is posted, and the system asks us if we want to see the generated entries. These entries will be a history of the imports and payroll records made. Selecting the “Yes” option will display the list of saved payroll import entries.
If payroll entries are uploaded to the journal and exited without posting, the data is deleted and reloaded when the user wants to post it. This performs one more security filter preventing sensitive data in the database from being pending registration.
Payroll entries and analysis
As in the previous case to access the payroll entries the user must have marked the check “Allow Show Payroll Entries” in the user setup.
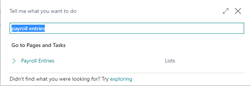
We can access this option from the main screen of the user’s role (if defined with a “Business Manager” role) or from the “Tell me what you want to do” option by searching for “Payroll Entries”

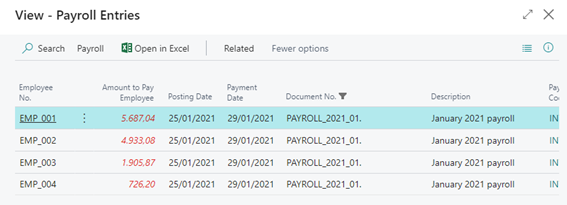
From this screen you can display all imported payroll entries.
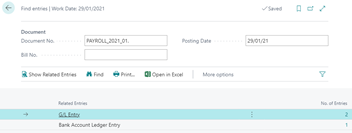
From this list of entries, we can navigate (Find entries by…) to the ledger and bank ledger entries, analyze information or generate the SEPA file.
a. “Navigate” option
From this option the user can navigate to the entries by posting date or by payment date.

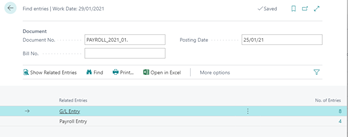
Selecting either option will show us the standard navigation BC screen considering the document number and posting date of the ledger entry or payment date. The entries that will be displayed are ledger entries, bank entries, and payroll entries.
b. “Payroll Entries Analysis” option
This option will be useful in case we want to analyze the data imported from the payroll files and we need to have the employee’s information (their code within BC and their name).
If the payroll file has been imported with the employee codes of the management and the employee relationship file, we will not have the data of the BC employee in the payroll entries. This option will re-request this employee link file and display a screen showing the data saved in BC.
To do this we will run the option “Payroll Payroll Entries Analysis“ and the following screen will be displayed.
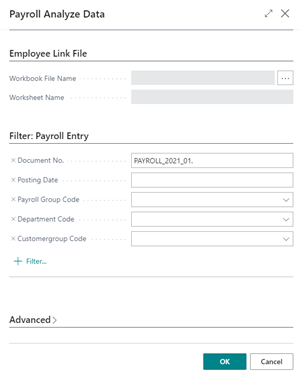
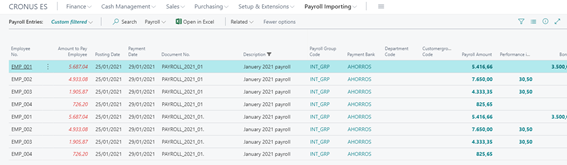
On this screen you can filter by the fields in the payroll entry table, in addition to selecting the employee relationship file (to select this file it will be done in the same way as explained in the import section of the payroll). Selecting the “OK” option will display a screen like that of payroll entries, but with the data of the BC employee.

This data can be sent to Excel for handling with some information analysis program.
c. “Export SEPA File” option
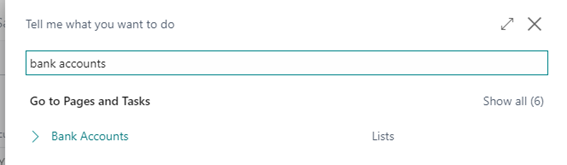
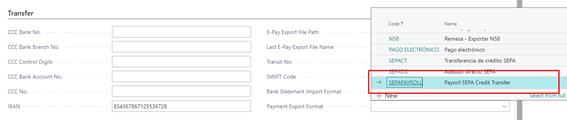
The last thing to do with payroll is to send the SEPA payment file to the bank. To do this we have to set up the export format of the payment file in the payment bank. When the application is installed in BC an export format is automatically created in the bank import/export settings called “SEPAPAYROLL”. To indicate this format in the payment bank, in the “Tell me what you want to do” option we will search for “Bank Accounts”.
Then, in the list of banks shown we will select the payment bank and the option “Manage –> Edit”.
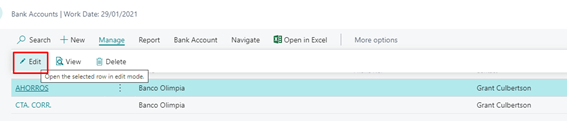
On the card shown, in the “Payment Export Format” field we will select “SEPAPAYROLL”.
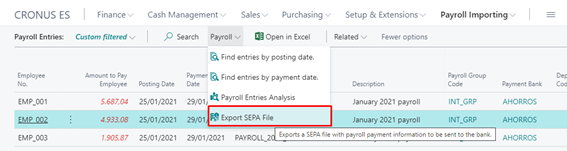
Once the bank is set up, in the payroll entries we will select the option “Payroll –> Export SEPA File”.
On the displayed screen we can apply filters to payroll entries (by default it is filtered by the document number in which we are positioned). We are also asked for an issue date and the employee relationship file (to select this file will be done in the same way as explained in the import section of the payroll). The latter is necessary to be able to access the data that is stored in the employee’s BC such as the IBAN.
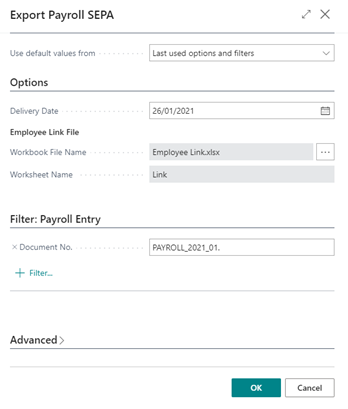
Selecting the “OK” option will generate the SEPA file and save it to our downloads folder.
